LNS Registration
Public Servers
Registering MacSync on TTN / Public LNS
You can register your device using either manual entry or QR scan.
Option 1: QR Code Registration
- Click “Scan End Device QR Code” on your LNS.
- In the Maya App, open Key & Identity and display the QR code.
- Scan the QR code using your LNS.
- The device will be automatically registered with all credentials filled in.
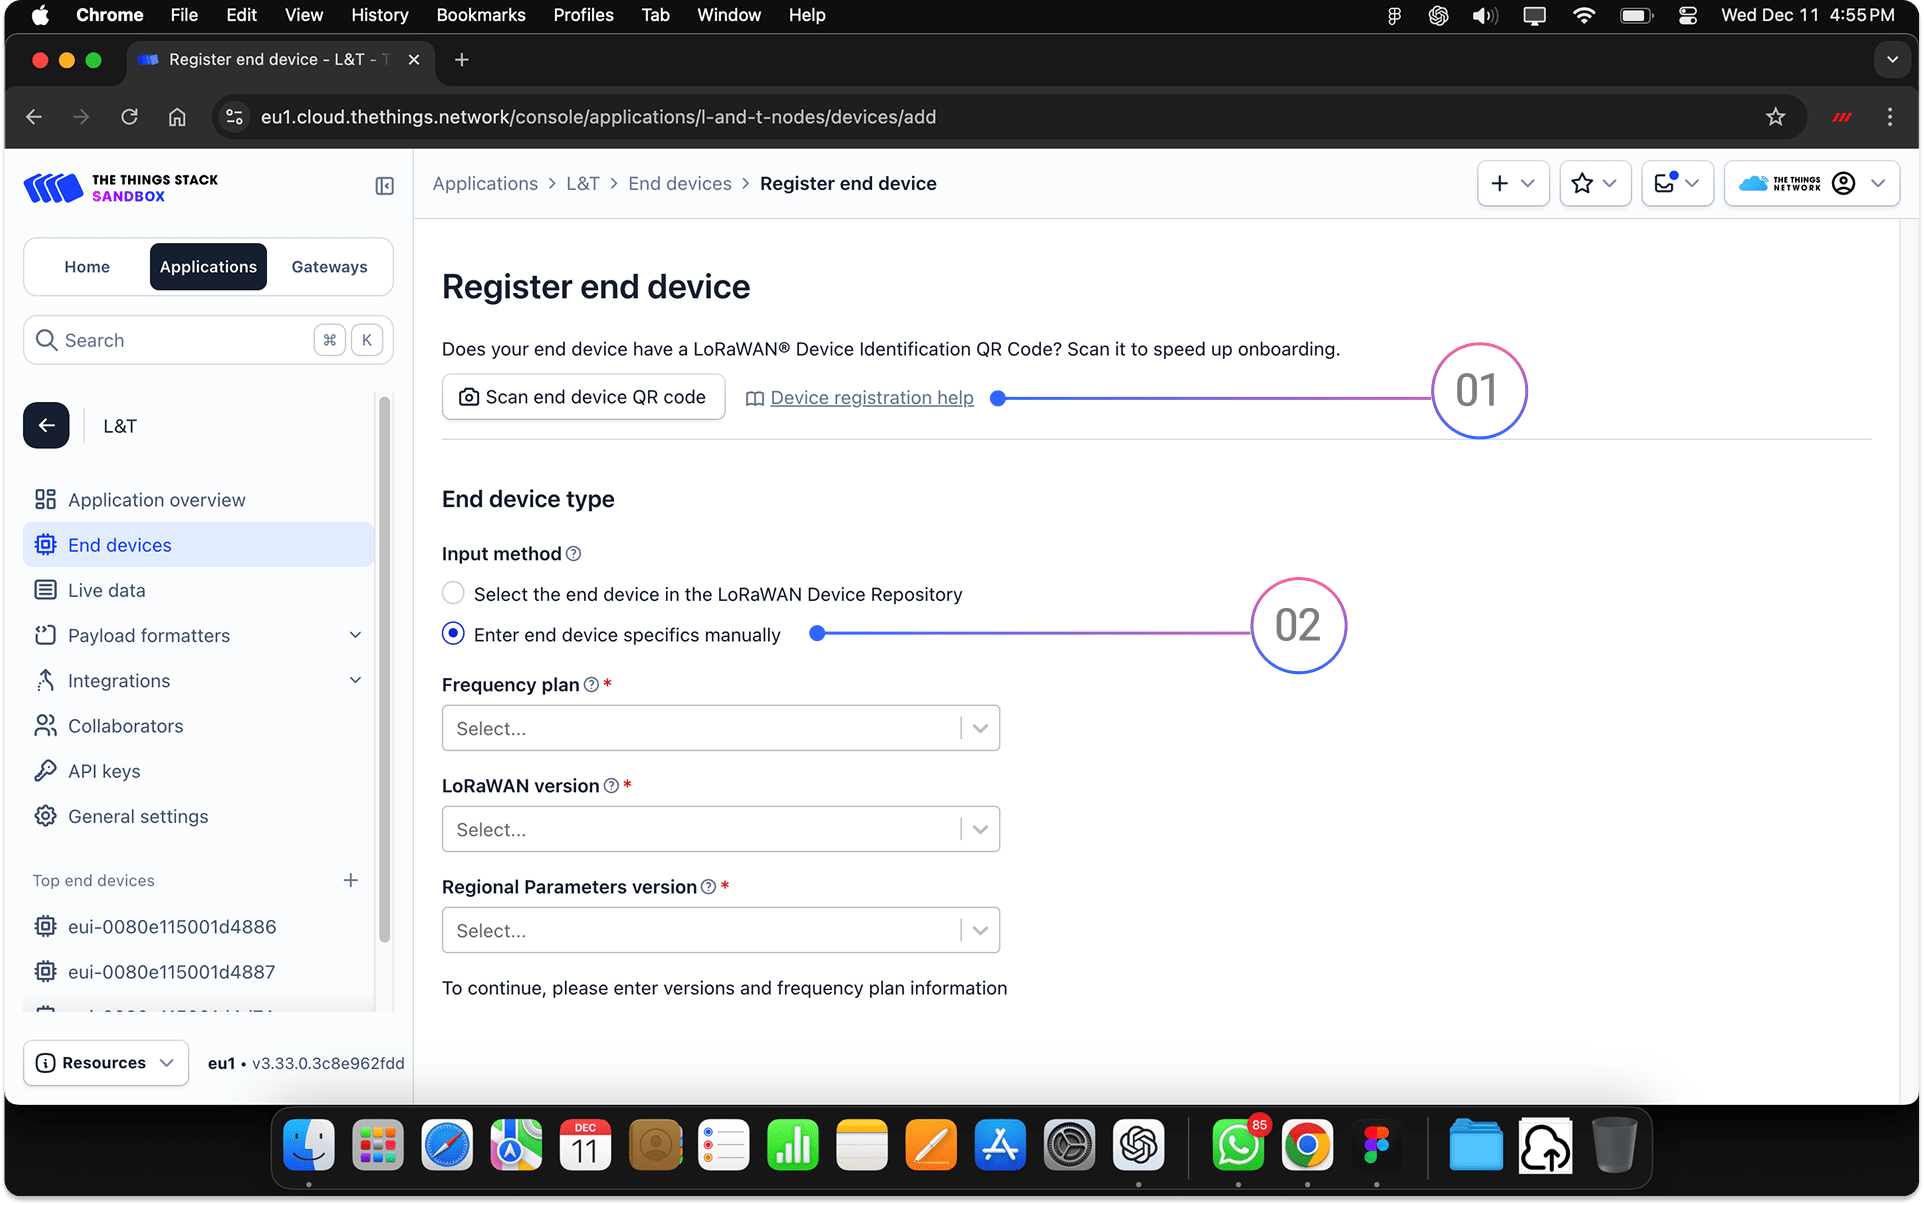
Option 2: Manual Registration
- Open your LNS (e.g., The Things Network).
- Click “Enter End Device Details Manually.”
- In the Macnman Maya App, go to the Key & Identity section.
- Copy the following:
- DevEUI
- AppEUI
- AppKey
- Paste these into the corresponding fields on your LNS.
- Select the correct LoRaWAN frequency plan (e.g., IN865, EU868, etc.).
- Complete the registration process.
Tip: For advanced security or re-onboarding, you can regenerate keys anytime from the Maya App under Key & Identity > Advanced Options.
Private Servers - Chirpstack
Registering MacSync Device on ChirpStack (Private LNS)
Follow these steps to onboard your device into your ChirpStack application:
Step-by-Step Instructions
- Log in to your ChirpStack dashboard.
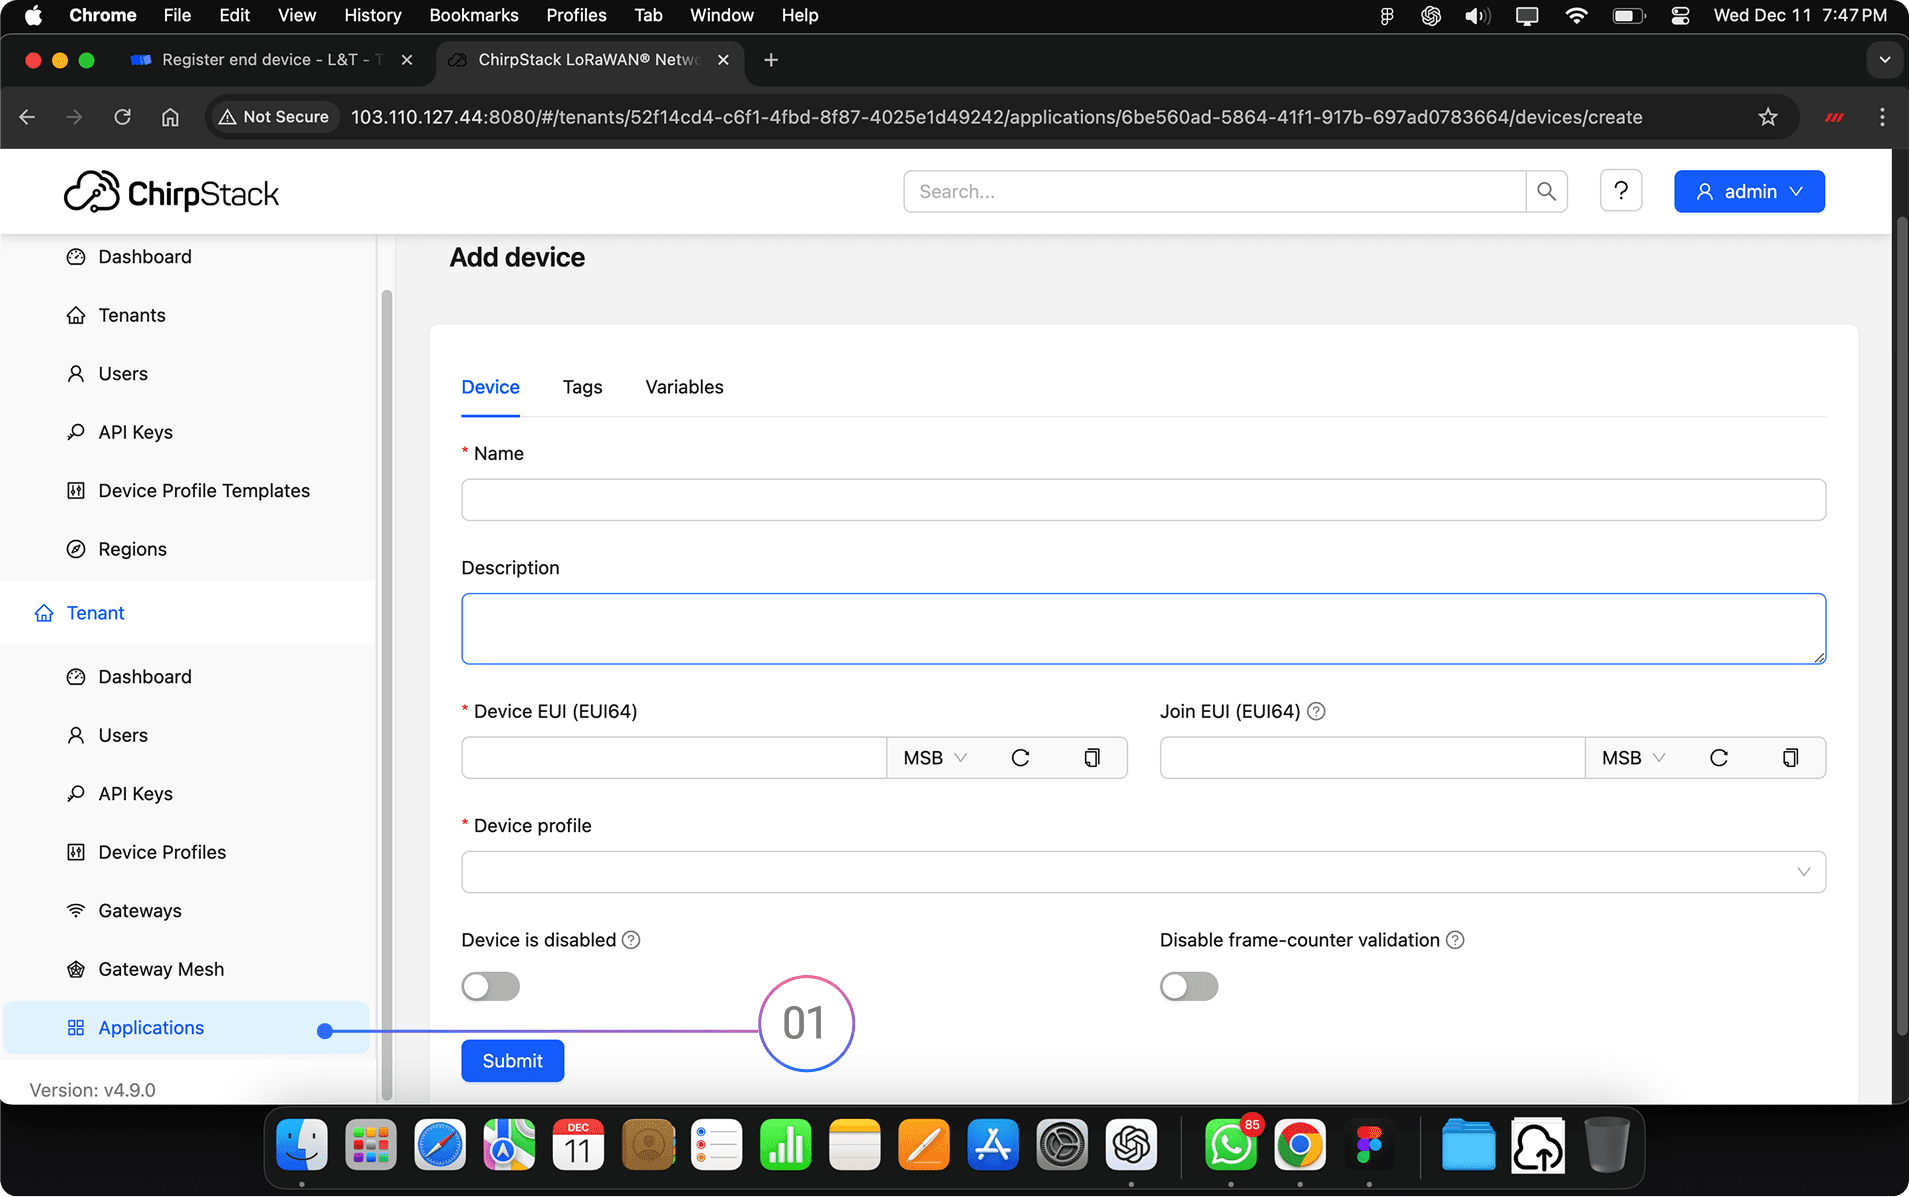
- Click on “Applications” from the sidebar.
- Select your existing application or create a new one.
- Click “Add Device” (top-right corner).
- Open the Maya App and go to the Key & Identity section.
- Copy the following values:
- DevEUI
- JoinEUI (AppEUI)
- AppKey
- Paste these into the corresponding fields in ChirpStack.
- Click Submit to register the device.
For enhanced security, you can regenerate the keys directly from the Maya app before registration.
Testing Uplink on ChirpStack with MacSync
After registering your device on ChirpStack, you can test the uplink using the Maya app:
Steps:
- Log in to your ChirpStack dashboard.
- Click on Applications and select your application.
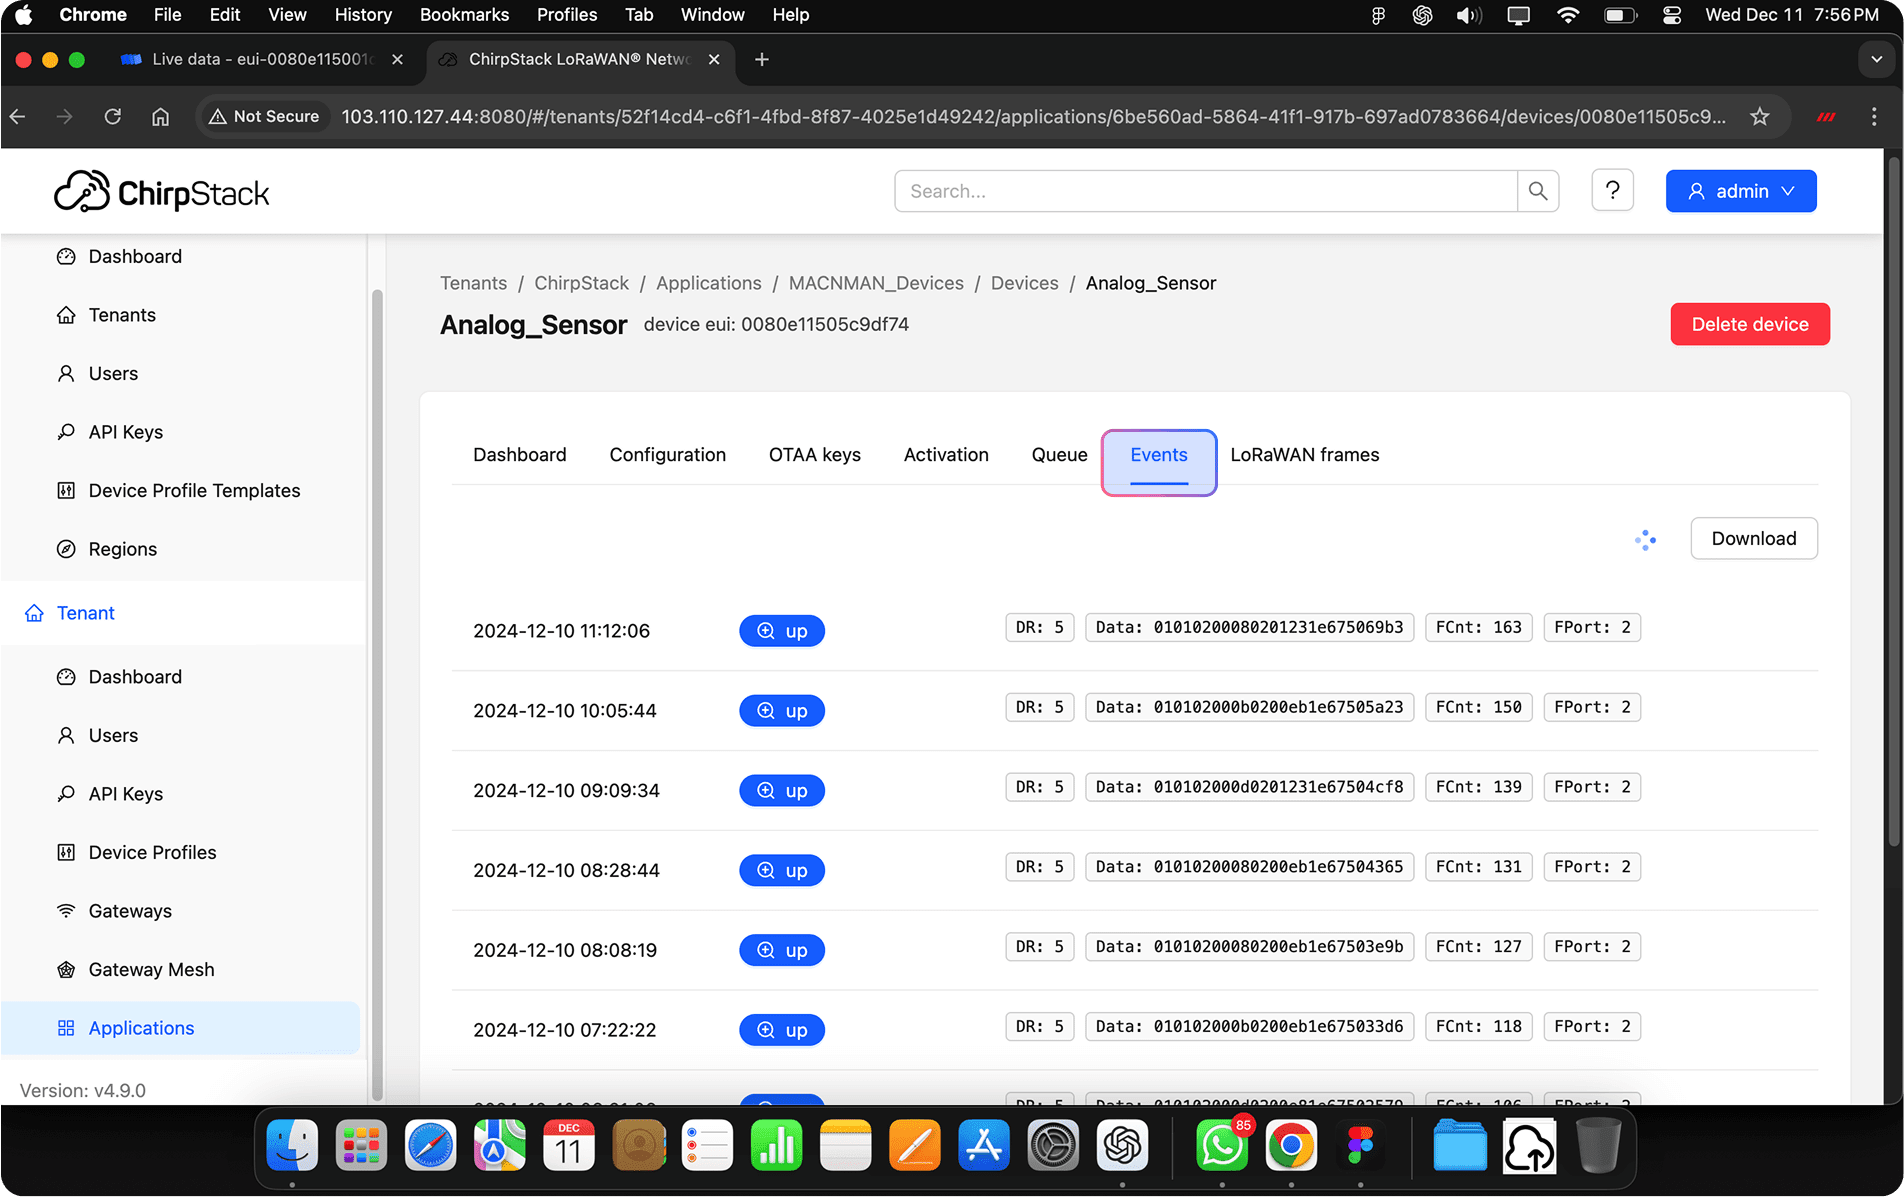
- Click on the device you registered (MacSync).
- Navigate to the Live LoRaWAN Frames or Device Data tab to monitor uplinks.
- On your mobile device, open the Maya App.
- Connect to the MacSync device via Bluetooth (BLE).
- Navigate to the Ping / Send Uplink section.
- Tap the “Send Uplink” or Ping button.
Result:
- The device will immediately send a confirmed uplink to the server.
- You should see the uplink appear in real-time on ChirpStack under Device Data or Live Frames.
Tip: The uplink also includes signal quality metrics such as RSSI, SNR, and Spreading Factor, which can help with diagnostics.
Sending Downlink from ChirpStack to MacSync
Once your MacSync device is registered and active, you can send downlink commands using ChirpStack’s Queue interface.
Steps to Send Downlink
- Log in to your ChirpStack dashboard.
- Click on Applications from the left sidebar.
- Select your specific application.
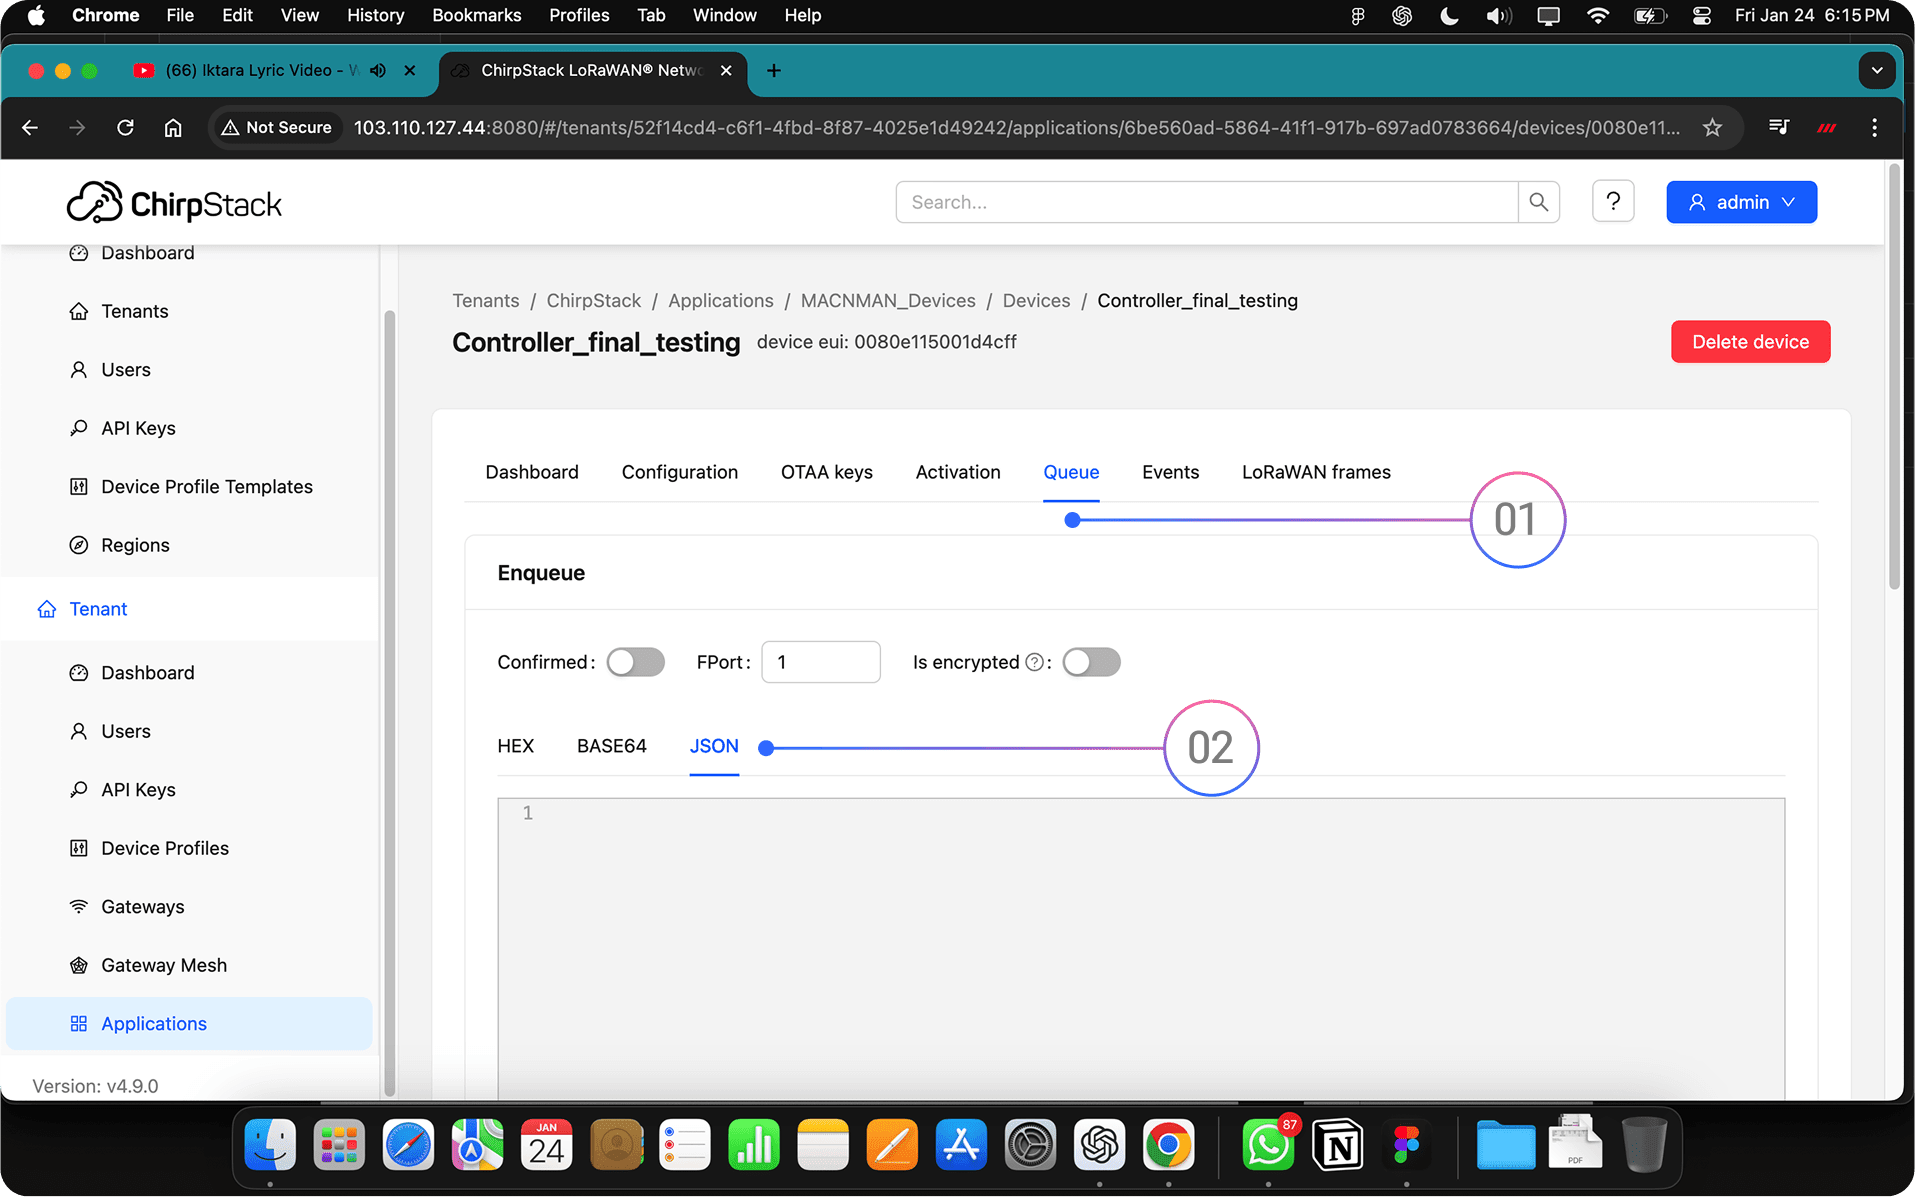
- Choose the registered device you want to send the command to.
- Navigate to the “Queue” tab.
- In the Queue section:
- Enter the downlink payload (in hexadecimal).
- Set the FPort (usually defined by your device's firmware).
- Choose whether it is a confirmed or unconfirmed message.
- Click Enqueue to send the message.
Notes
- The downlink will be sent on the next uplink from the device (as per LoRaWAN Class A).
- Ensure your MacSync device is configured to support the downlink functionality.
If using Class C, the downlink will be sent immediately since the receiver is always listening (for power-operated versions).